Alocasia Amazonica Polly Care Guide: Corms, Winter Dormancy secrets
How to keep this dramatic jewel aroid thriving year-round, revive it from winter sleep, and propagate baby plants from underground corms.
The Dramatic Jewel of the Tropical Family
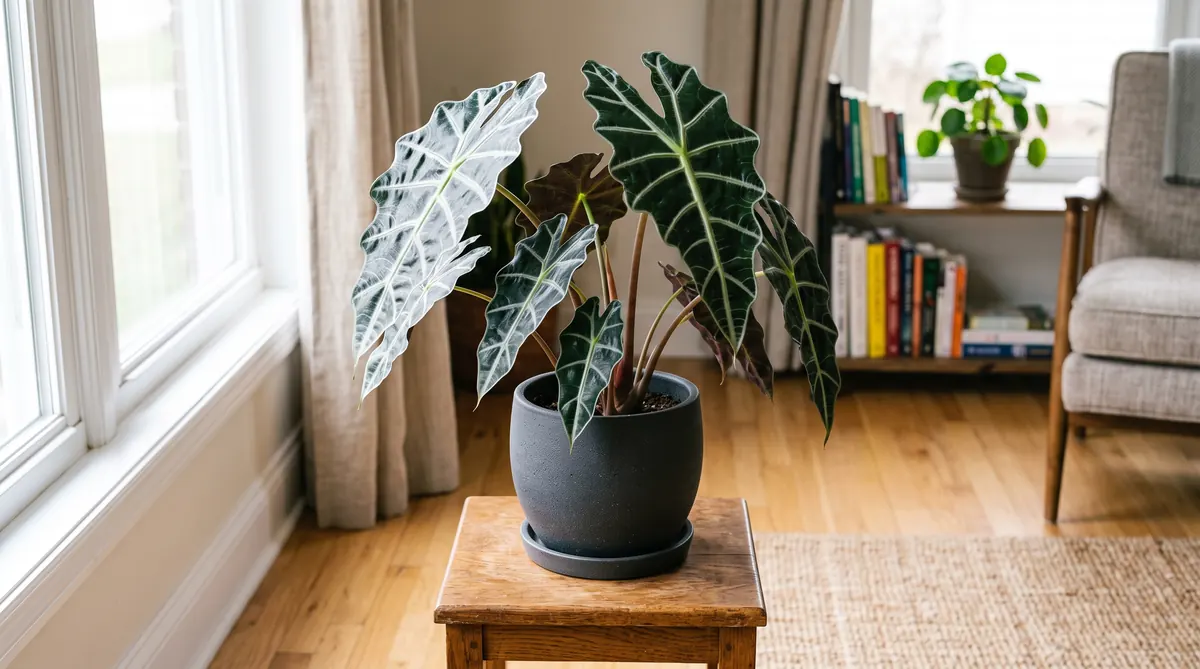
Few plants make as bold an impression as Alocasia amazonica ‘Polly’ (often called the African Mask or Jewel Alocasia). With its deep emerald arrowhead leaves, wavy edges, and striking white ribbing, it looks almost sculptural. But if you have ever kept one, you probably know the sinking feeling of watching its leaves turn yellow and drop off one by one when the weather cools down.
During my second winter keeping tropicals, my prized Polly dropped all five of its leaves until I was left looking at a pot of bare dirt. I almost threw the entire pot in the trash. Luckily, an experienced grower told me to stop and check the soil. Hidden beneath the surface was a firm, healthy underground tuber called a corm. Come springtime, that “dead” pot sprouted three brand-new leaves. Once you understand how these plants use corms and why they go dormant, caring for them becomes exciting rather than intimidating.
The Science: Corms, Guttation, and Winter Sleep
1. Understanding the Underground Corm Engine
In their native Asian rainforest habitats across the Philippines and the Sunda region (Hay, 1998), Alocasias experience seasonal shifts in temperature and rainfall. To survive dry or cooler spells, the plant stores carbohydrates, water, and growth hormones in an underground modified stem called a corm (Nauheimer et al., 2012).
If your indoor room drops below 60°F (15°C) or light levels plunge in November, the plant pulls its energy back down into the corm, allowing top leaves to wither. As long as the corm remains firm and rot-free, the plant is simply resting. When warmth and longer daylight return in spring, the corm pushes out fresh spears of growth.
2. Why Does My Alocasia “Cry” in the Morning? (Guttation)
Many new growers wake up to find clean water droplets clinging to the tips of their Alocasia leaves and worry that the ceiling is leaking. This process is scientifically called guttation (Feild et al., 2005).
At night, when the plant’s stomata close and water is no longer evaporating from the leaves, the roots continue absorbing moisture from the soil. The resulting root pressure pushes excess water out through microscopic specialized pores along the leaf edges called hydathodes. Guttation is completely harmless and simply shows that your plant’s vascular root system is actively hydrated.
Everyday Care Routine for Home Growers
1. Bright, Filtered Sunlight
Alocasias love bright light, but their dark leaf cuticles can burn under direct summer afternoon sun. The sweet spot is two to three feet back from an east-facing window or a south-facing window softened by sheer curtains. Giving the plant plenty of bright light is the best way to prevent seasonal dormancy when days get shorter in autumn.
2. Chunky, Well-Aerated Substrate
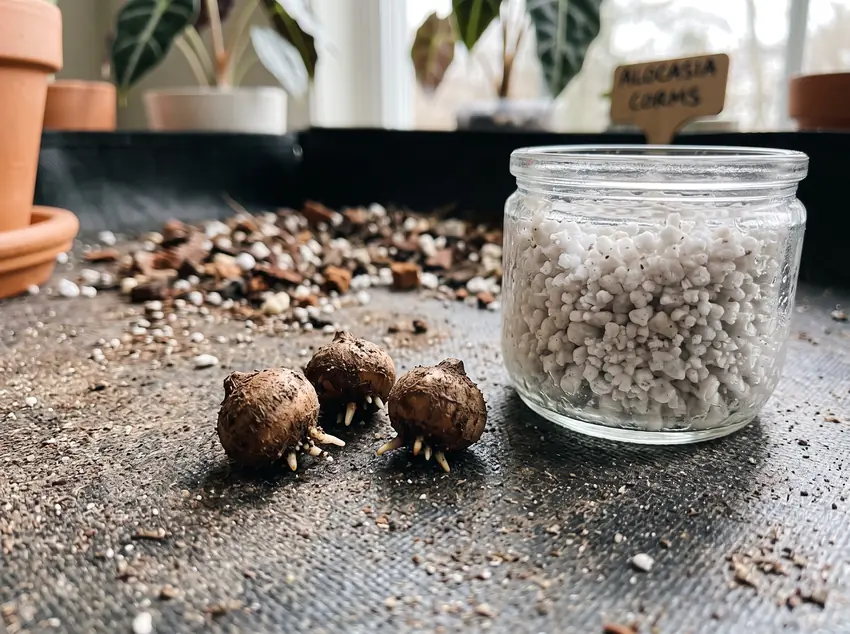
Because the corm sits directly in the soil, heavy wet soil will turn the bulb into a mushy, rotten mess within weeks. Use a loose, aerated mix of 40% coarse orchid bark, 30% perlite or pumice, 20% coco coir, and 10% worm castings. This allows water to run right through while keeping humid air pockets around the delicate feeder roots.
3. Watering: Even Moisture Without Swamps
During active spring and summer growth, keep the soil lightly and consistently damp, letting just the top inch dry out between waterings. In winter, scale back significantly. For a full breakdown of winter light and moisture adjustments, see my in-depth guide on Winter Care for Tropical Houseplants: Managing Light Loss, Heater Drafts, and Dormancy.
4. Sprouting Baby Plants from Corms
When repotting in spring, gently search the root ball for tiny, firm, marble-sized bulbs attached to the main roots. You can detach these corms, peel away the thin brown outer skin, and place them pointed-side up in a shallow cup of damp perlite or moist sphagnum moss inside a clear container.
Keep the container warm (72°F to 78°F / 22°C to 26°C), and within three to six weeks, you will see roots emerge from the bottom and a green shoot push toward the light. For complete step-by-step propagation setups, visit Tropical Plant Propagation: Stem Nodes, Air Layering, and Water-to-Soil Transitions.
Quick Care Cheat Sheet
| Care Factor | What Works Best | What to Watch Out For |
|---|---|---|
| Light | Bright, filtered indirect light (East or shaded South window) | Harsh direct afternoon sun scorches leaf surfaces |
| Watering | Maintain light, even moisture in summer; let top inch dry | Standing in stagnant water quickly rots the underground corm |
| Temperature | Warm rooms (68°F to 82°F / 20°C to 28°C) | Temps below 60°F (15°C) trigger sudden leaf loss and dormancy |
| Humidity | High humidity (55% to 70% RH is ideal) | Dry indoor air invites spider mites and causes crispy margins |
| Feeding | Diluted balanced fertilizer every 3-4 weeks in spring/summer | Never fertilize a dormant or leafless corm in winter |
Troubleshooting Common Alocasia Headaches
• Oldest Leaf Turns Yellow Whenever a New Leaf Emerges
This is very common in young Alocasias with small corms. The plant pulls stored nutrients from the oldest leaf to fuel the new one. As the corm gets larger over the years and you provide consistent light and feeding, it will easily hold five to eight leaves at once.
• Drooping Leaves and Stems in Autumn
Shorter days and cooler room temperatures signal the plant to rest. Move it closer to a bright window or under an inexpensive LED grow light and keep room temperatures above 65°F (18°C) to keep it awake through winter.
• Tiny Dusty Cobwebs on the Underside of Leaves
Spider mites love the tender underside of Alocasia leaves. Take the plant to the shower immediately and rinse the foliage with lukewarm water, then spray thoroughly with insecticidal soap or diluted neem oil, repeating every five days until clean.