Root Rot in Tropical Houseplants: How to Save Your Tropical Plants
Why water molds attack suffocated roots, how to safely prune infected tissue, and the exact step-by-step hydrogen peroxide protocol to revive dying plants.
The Heartbreaking Smell of Sogginess
Every houseplant grower remembers their first major encounter with root rot. For me, it was a prized Monstera albo that suddenly developed limp, yellowing lower leaves with strange black halos. Confused because the soil still felt wet, I did what many beginners instinctively do: I poured in more water thinking the plant was wilting from thirst.
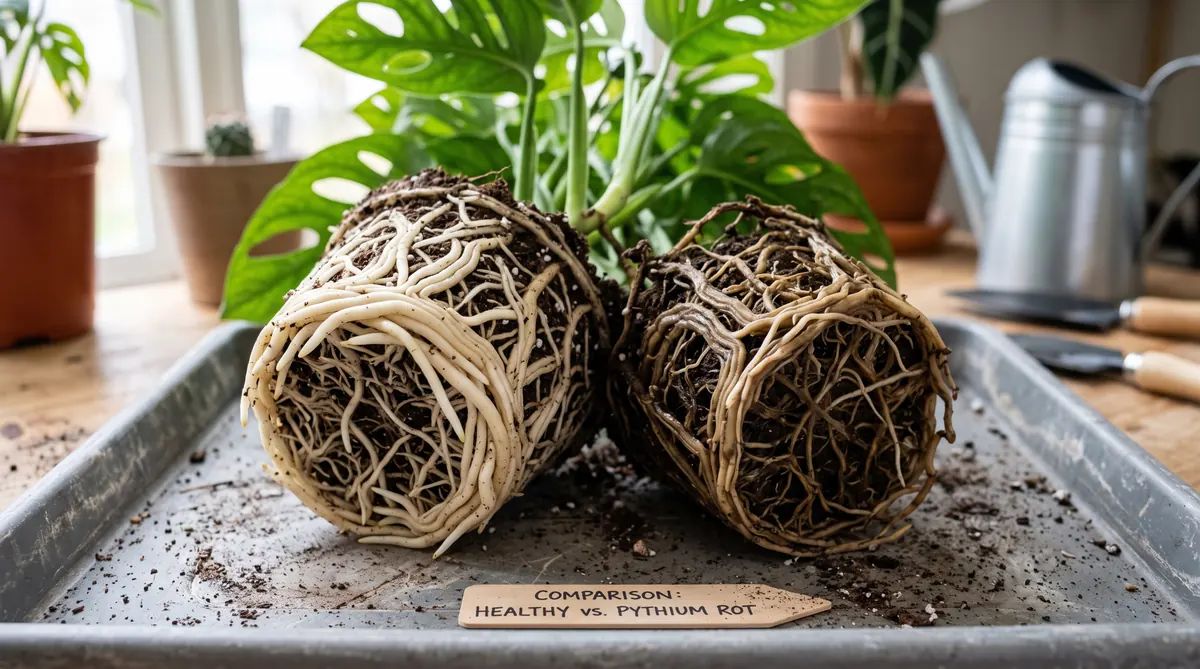
Two weeks later, the entire plant leaned sideways. When I finally pulled it from the decorative ceramic planter, the sour, swampy odor told the whole story. The bottom four inches of the pot had turned into cold, black mud, and ninety percent of the once-thick white aerial roots had dissolved into brown, mushy threads.
That heartbreaking loss set me on a deep dive into root microbiology. I learned that root rot is rarely caused by water alone. Instead, it is an opportunistic fungal-like attack triggered when roots run out of oxygen. More importantly, I discovered that even advanced cases of root rot can be saved if you act quickly with sterile surgical pruning and the right substrate recovery protocol.
The Science: Root Hypoxia and Opportunistic Oomycetes
1. Root Suffocation (Hypoxia Kinetics)
Plant roots are not passive straws; they are living respiratory organs that consume dissolved oxygen to generate cellular ATP for nutrient uptake. In healthy, porous soil, oxygen diffuses rapidly through air-filled pores (Drew, 1997).
When dense potting mix remains saturated for days, water fills every microscopic void. Oxygen diffuses roughly 10,000 times slower through stagnant water than through open air. Within 24 to 48 hours of saturation, root zone oxygen levels plummet to near zero (a condition called hypoxia). Root cells begin to starve for energy, cell membranes rupture, and the plant leaks sugars and amino acids into the surrounding soil moisture.
We explored the physics of water retention and perched water zones extensively in The Science of Watering Tropical Houseplants. When roots stay drowned, physiological collapse is only a matter of time.
2. The Attack of Oomycetes (Pythium and Phytophthora)
Those leaked sugars act like a dinner bell for soil-borne pathogens. The primary culprits behind tropical root rot belong to water mold groups called oomycetes, predominantly Pythium ultimum and Phytophthora species (Agrios, 2005; Hendrix & Campbell, 1973).
Unlike true fungi, oomycetes produce swimming, flagellated spores called zoospores. These zoospores use chemical cues to home in directly on damaged, suffocating root tips. Once attached, they secrete pectolytic enzymes that dissolve root cortex walls, causing the outer sheath of the root to slip off entirely while leaving only the dead vascular wire behind.
Diagnosis: Root Rot vs Underwatering vs Fertilizer Burn
Because rotten roots cannot transport water upward, a rotting plant wilts and turns yellow, mimicking drought. Before you reach for the watering can, check this diagnostic comparison:
| Symptom | Pythium Root Rot | Severe Underwatering | Fertilizer / Salt Burn |
|---|---|---|---|
| Soil Moisture | Wet, heavy, or cold even days after watering | Bone dry, pulling away from pot rim | Variable (often shows white crust on top) |
| Leaf Appearance | Soft yellowing, black watery patches with yellow halos | Dry, crispy tips, curled, papery drooping | Crispy brown leaf edges and necrotic margins |
| Root Texture | Brown or black, mushy, outer layer slides off | Shriveled, brittle, dry, but firmly attached | Stunted tips, brownish but firm, not slimy |
| Soil Odor | Sour, swampy, stagnant rotten egg smell | Neutral or dusty earthy smell | Normal clean potting mix smell |
The 5-Step Surgical Root Rescue Protocol
Do not wait for tomorrow if you suspect root rot. Water molds spread aggressively through damp tissue. Here is the field-tested protocol I use to rescue valuable tropical plants:
Step 1: Unpot and Wash the Root Ball
Gently slide the plant out of its pot. Discard all old, waterlogged soil directly into the trash bin; never reuse infected potting soil in your garden or compost. Bring the root system to a sink or tub and rinse away the remaining soil with lukewarm tap water until the root structure is completely visible.
Step 2: Surgical Debridement (Sterile Pruning)
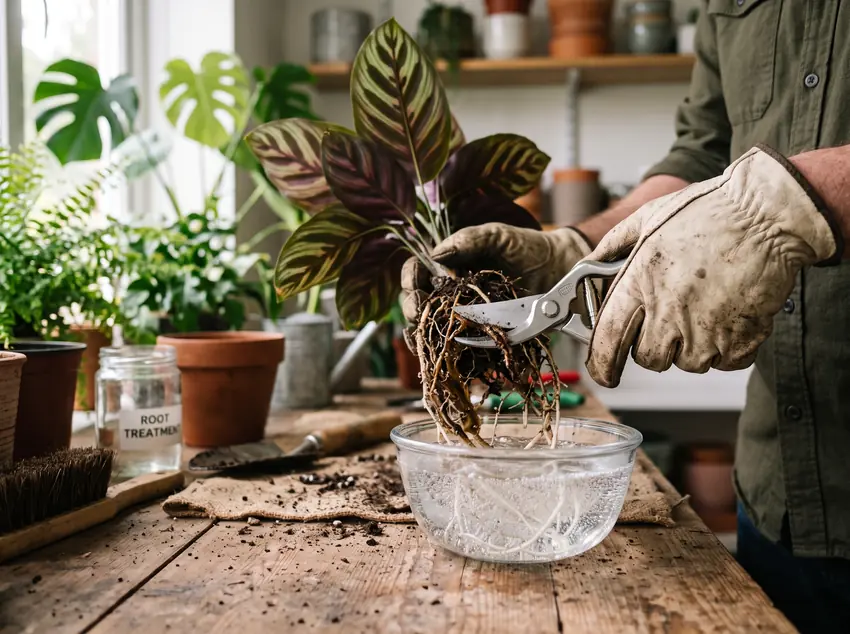
Using a sharp pair of pruning shears or a razor blade wiped down with 70% isopropyl alcohol, snip off every single piece of brown, black, slimy, or hollow root. Make your cuts roughly 1/2 inch into firm, clean, white or cream-colored root tissue. If you cut through black tissue and see a dark central core, keep trimming upward until you reach pure healthy flesh.
Step 3: The Hydrogen Peroxide (H2O2) Disinfection Dip
Standard 3% household hydrogen peroxide is a grower’s secret weapon against oomycetes (Yan et al., 2011). Peroxide rapidly releases oxidative free radicals that rupture pathogen cell walls while releasing oxygen into suffocated root tissues.
The Recipe: Mix 1 part standard 3% hydrogen peroxide with 3 parts room-temperature water. Submerge the remaining healthy roots in this solution for 10 to 15 minutes. You will see mild bubbling as the peroxide oxidizes remaining organic debris. After soaking, gently pat the roots dry with a clean paper towel.
Step 4: Downsize the Pot and Use High-Porosity Substrate
A common trap is repotting the plant back into its original large container. If you removed 50% of the root system, the old pot now holds far too much soil volume, creating a persistent wet zone. Choose a clean pot with drainage holes that is only 1 to 2 inches larger than the reduced root cluster.
Plant your rescue specimen into a light, chunky substrate featuring 40% coarse pine bark, 30% coarse perlite or pumice, and 30% peat or coco coir. For exact mixing ratios, review our complete breakdown in Chunky Aroid Soil Mix: Why Aeration and Macroporosity Matter Indoors.
Step 5: Canopy Balancing and ICU Care
Because the reduced root system can no longer supply water to a massive canopy, prune away 20% to 30% of the oldest or most damaged lower foliage. This balances transpiration demand with root water uptake (Kramer & Boyer, 1995).
Place the plant in bright, indirect light (avoid hot direct sun) and keep the ambient humidity moderate (50% to 60%). Do NOT fertilize for at least 4 to 6 weeks. New feeder roots are extremely sensitive to mineral salts and need time to re-establish.
Troubleshooting Root Rot Recovery
• All Roots Are Gone: Can I Still Save the Plant?
Yes! If the main stem or rhizome still has healthy green tissue and active nodes (especially on Monsteras, Philodendrons, and Alocasias), cut away all rotten stem tissue, dip the base in rooting hormone with fungicide, and reroot in sterile water, damp sphagnum moss, or perlite under high humidity.
• The Plant Droops More Right After Repotting
This is normal transplant shock. The remaining roots need several days to form new root hairs. Do not pour in excess water; instead, increase room humidity or place a clear plastic bag loosely over the canopy to reduce moisture loss through the leaves.
• Should I Use Cinnamon on Cut Root Wounds?
While household cinnamon contains cinnamaldehyde with mild antifungal properties, it is also a powerful desiccant that can dry out tender tropical root tips. Stick to a 3% hydrogen peroxide dip or a targeted copper fungicide for root surgery.